Showing posts with label DIY. Show all posts

January 13, 2012

The Good, The Bad, The Ugly

We have very cold weather and snow right now; which is bad.  I hate cold weather.

But the chickens hate the snow (though they are fine with freezing temps) and won't step outside on to the white stuff.  Which is good.  See that open gate on the left?  That's pure freedom to roam the neighborhood but they won't cross the snow. I don't have to chase down any escaped chickens.

Which is really good cause I'd rather the neighbors not see me sporting these beauties (the ugly):

Its good that I have them because I've been making lots of trips out to the coop... because the water keeps freezing, which is bad:

But my husband, who is good and totally not ugly, went and bought a heated pet bowl and saved the day(s)!  Though the chickens still peck at the ice block before realizing its ice and then go over to the water.  Chickens aren't the smartest.

Its a good thing I dug that 55 FOOT LONG TRENCH from the house to the coop. With my bare hands. And a pick axe, so we could have an electrical outlet there. That's all a bad memory now.

So we're staying inside a lot which is good because I'm catching up on some projects like this wine night light (for grown ups, not my kids):
(pretty, huh? you want a tutorial on this one? I'm really good at tutorials - hahaha)

However, now my dining room table looks like this:

Which is bad because I have company coming over; but its a good thing its just family.

However crafting sometimes results in the ugly:
(taken with my cell phone cause that's my right hand ya'll!  I can't even hardly lift my camera with my left hand.)

And it was really stuck.  I tried soaking it, which ruined the picture inside.  Then decided to go outside in the cold to make my fingers shrink (cold does that right?).  Going out in freezing temps with a recently soaked, wet hand stuck in a glass bottle is not a good idea.  You're welcome. Because I learned that lesson for you.

I knew this was a sit on the couch day the minute I sent my kid off to school without his backpack. Or lunch.


June 22, 2011

Laziness: the Mother of Invention

We get the Family Fun magazine and the kids love looking through it.  The most recent issue has a "kid wash" you can build out of pvc pipe.

Have you seen it?
Deluxe Kid Wash (photo credit Family Fun)
My kids have seen it.  They have been begging to build it.  The coop construction has really taken up most of our extra project time (and hardware store budget).

The guilt of not getting around to the kid wash project was starting to eat at me a bit.

I wasn't up for another hardware store trip. I made do.
Is that a hose and nozzle bungee corded to your deck rails?

Why yes, yes it is.

Did my kids care it wasn't the super cool, pvc behemoth in the picture?

Well no, no they didn't.
In fact they were so excited one of them might have forgotten he didn't need to wear underwear with his swim trunks.

Fill up the truck. Dump the truck.  Fill up the truck. Dump the truck.  These are the moments that fool you in to thinking having kids is easy.

Looks like a shower, counts as a shower.  Right?
Love that Shot is having a birthday celebration this week and the theme is Splish Splash.... I'm linking up to this shot to enter their giveaway.  Want to see more splish splash photos or enter your own?  Head on over to Love that Shot.


Later in the evening after we returned home from dinner out, the boys were super excited to find eggs in the chicken coop...
Not sure who the prankster was that left the plastic eggs in there but it provided lots of jokes and giggles for the boys (with their cousin here) so thanks!

February 13, 2011

Valentines Day | DIY Crayon Hearts

We've been stuck inside a lot.  I can't remember how long its been since the ground wasn't ice or snow covered.  We been busying ourselves with projects and way too much Wii.  We needed to do Valentines for 20 classmates and I've always wanted to try melting crayons to make new ones.  I found a silicone mini heart shaped mold and thought heart shaped crayons would be perfect for Valentines this year ~ I just hope none of the kids thinks they're candy and tries to eat them.

Supplies needed:
Crayons (we have tons of broken cans, restaurant crayons, etc)
Muffin pan (mini works best, any shape will do, but this project may just ruin it for future use so choose wisely)


Peel the wrappers from the crayons (I used an exacto knife and slit down one side to make it easier for them to get the wrappers off).  Break up the non-broken crayons and place in mold.  Put in a 220 degree oven for about 20 minutes.  Let cool.  Some of the darker color combos just mixed into a solid dark color but most made great color mixes.  We had fun popping in bits of gold, silver, and white from the few crayons we had in those colors.

The kids (my niece joined us for the day) put the crayons in little baggies (I think they are candy bags) and decorated them with punched out hearts and circles from old paint chip samples.

There is a layer of cloudy wax that forms on the top - it doesn't have color and makes the one side of the heart concave.  I shaved this off using the slicer/grater.  This was a very easy project and a good way to use up those broken crayons - my crazy kids won't use crayons if the tip is broken off.  The decorating the baggies and getting Evan to sign his name 20 times was the hardest part.

Happy Valentines Day everyone!

January 21, 2011

Tin Can Telephones

Late night TV time and those soup commercials keep coming on... you know the ones where the people are calling the soup company on the tin can "phone" to talk to their grandmother? No? Just me? Well, whatever, it sparked an urge to make a tin can telephone for the boys.

Two cans, some string... how easy is this?!? All you need...2 cans, string, hammer, nail, and a sucker an assistant to hold the nail.


Directions:
1. Thoroughly wash the cans and remove labels
2. Poke a hole through the bottom of the can using a nail and hammer
3. Thread string though the holes of each can and tie a large knot on inside of can
4. Try to explain the science of it all to your kids while they loudly yell into their cool new phones, ignoring everything you say.

A few tips... Mason string is not the best choice (we were on a speedy errand run and it was that or twine). I've read that kite string is best. Cans with pop off tops are no good - they leave a sharp ring around the opening.


I decided to hang these up in the boys room. They are in bunk beds and sometimes play in there fort style... every fort needs a tin can phone, right? I put them at the foot of the bed to discourage bedtime phone calls.


I called the husband a "few" times during the day trying to determine the safest way to put the eye screws in the wall. Call 1: can I nail a hammer in for a pilot hole?; Call 2: will the plaster get messed up if I drill a pilot hole?; Call 3: do I need to use an anchor even if we're only talking about a few ounces of weight to support? Mid-day my hubby walks through the door with this:
Just for me. He loves me, he really loves me! Its all mine. The boys have been informed "hands off, its mommy's special toy". Now if I could just get him to walk through the door with my very own nail gun.

December 16, 2010

Its beginning to look a lot like Christmas | DIY Ornaments

We've been feeling really cooped up with the cold weather and a project was way overdue.  We found the homemade paper ornaments project in the Family Fun Magazine.  You can check out the full instructions on their site at HERE
Items needed:
3 sheets of colored construction paper (for 1-2 ornaments)
Cookie cutters
Blender
Towels
Seive
Ribbon, glitter

We laid out a plate with a kitchen towel on it and topped it with paper towels to put our cookie cutters on.  The boys went to work tearing the pieces of paper up.  They really enjoyed ripping it up.  For about one sheet worth.  Then I was given the honor of ripping up the rest. Yay me.


We added the paper to the blender (we used our bullet) then added boiling water and let them soak for 5+ minutes.  Then blend to a pulpy mush.  Strain the water out of the pulpy mush using a seive; then fill your cookie cutters - be sure to fill in the crooks and angles well!  Press it all in nice and tight and blot with a towel to get excess water out.  Gently remove the ornament from the cookie cutter, sprinkle with glitter, and place on a cookie sheet in a 200 degree oven for at least two hours.  I think we did ours for more like 6 hours.

While you wait for the ornaments to dry out feel free to get creative.  Wear socks on you hands. Underwear on your head.  Lay around and sigh a lot like your mom is torturing you with the waiting game.  Or go the more dignified route of entertaining yourself with legos and playtime while you wait.
He took the underwear off his head when he saw the camera.  I need to work on my sneakiness when hunting with a camera.

Hang the finished product on the tree.  It looks homemade.  I think that's a good thing.  The kids are pretty bummed that they couldn't eat them.  I guess if it comes out the oven it should be edible by their reasoning.

The Christmas decorations are up.  We've done cut out snowflakes; put up the tree and hung the ornaments; sent Christmas cards out, played in the snow; and been to see Santa... Its definitely beginning to look a lot like Christmas around here. 

October 20, 2010

our spooky halloween tree | DIY project

Every store.  Every single store. They all have Halloween displays.  My kids have to explore every single one.  This adds an average of 35 minutes on to any errand we run.  I don't mind them looking at the displays so much as the non-stop begging and insisting that we NEED to have these spooky decorations.  I decided we could make our own at home for less money since they didn't like my idea of buying some decorations when they went on clearance after Halloween.  These kids are way too hung up on the whole instant gratification thing.

So I went digging in the backyard for an old cast iron planter I knew had been relegated to an out of sight, out of mind corner of the yard.  It was not aging well.  Apparently neglect causes rust.  Then the kids and I set out on a hunt of the neighborhood for that just-right fallen tree branch.  After a lot of walking and finding nothing we came home, looked up, and voila!  Dead tree branches right there above us in the tree.  I tried to pretend the neighbors didn't notice me jumping up and down repeatedly trying to grab the branches to pull them down.  It only took 5 tries to get two branches, I'm sure nobody saw me.  Even the ones standing in their doorways looking our way with odd looks on their faces.  Carry on.  Just carry on.  We stuck the branches in the planter - which looked way better with the unknown dead plant removed and a new coat of black spray paint.  Then we spray painted the branches with the same black spray paint.  Another coat of spray paint - but this time with silver glitter.  My front yard has a nice glittery glow to it when the sunlight hits it - bonus.
After nap when everything was dry we strung some orange string lights on the tree and placed it in the front flower bed.  The dead tree branches matched well with the dying plants and bushes in there.  Made me think I could have saved myself all the jumping for tree branches and spray painting trouble and just hung the lights on the dying bushes.  The boys think its really cool, and spooky. We'll call this a success even though I'm not all that impressed with it.  My kids impressed = success.  All my husband had to say when he came home and saw it in the front yard was 'That thing is not going in the house'.  I guess he wasn't all that impressed either.  The sun had just about set when he got home so he didn't get to see the pretty, glittery lawn.  I'll let that be a surprise for him for another day  :)

So total cost for two cans of spray paint and a string of lights = under $10.  Probably more than something similar would have cost us at post Halloween clearance sales.  ::sigh::


e

October 15, 2010

Book Shelves for Under $20 | DIY Project

I've been working on the boys room for a while now (baby steps, I tell my husband). Actually I guess I've been working on it for over 5 years since we never did decorate the baby room beyond a coat of 'we don't know the baby's gender' light green paint. They are big boys now and like things more along the lines of legos and star wars so I'm trying to give them that. Well, in a subtler, cooler kind of way then their proposed Star Wars stickers all over the walls suggestion. We've painted the wall a cool silver/gray color.

We have a ton of kids books. They've overflowed from the little book bin in their room and on to the adult bookshelves and almost every other surface in the house so I really wanted a way to get some of those books in their room. I looked around for just where to put this shelf for books (having two concrete walls in their room makes hanging things hard) and then I saw it... that too often overlooked, underused, empty wall. behind the door...

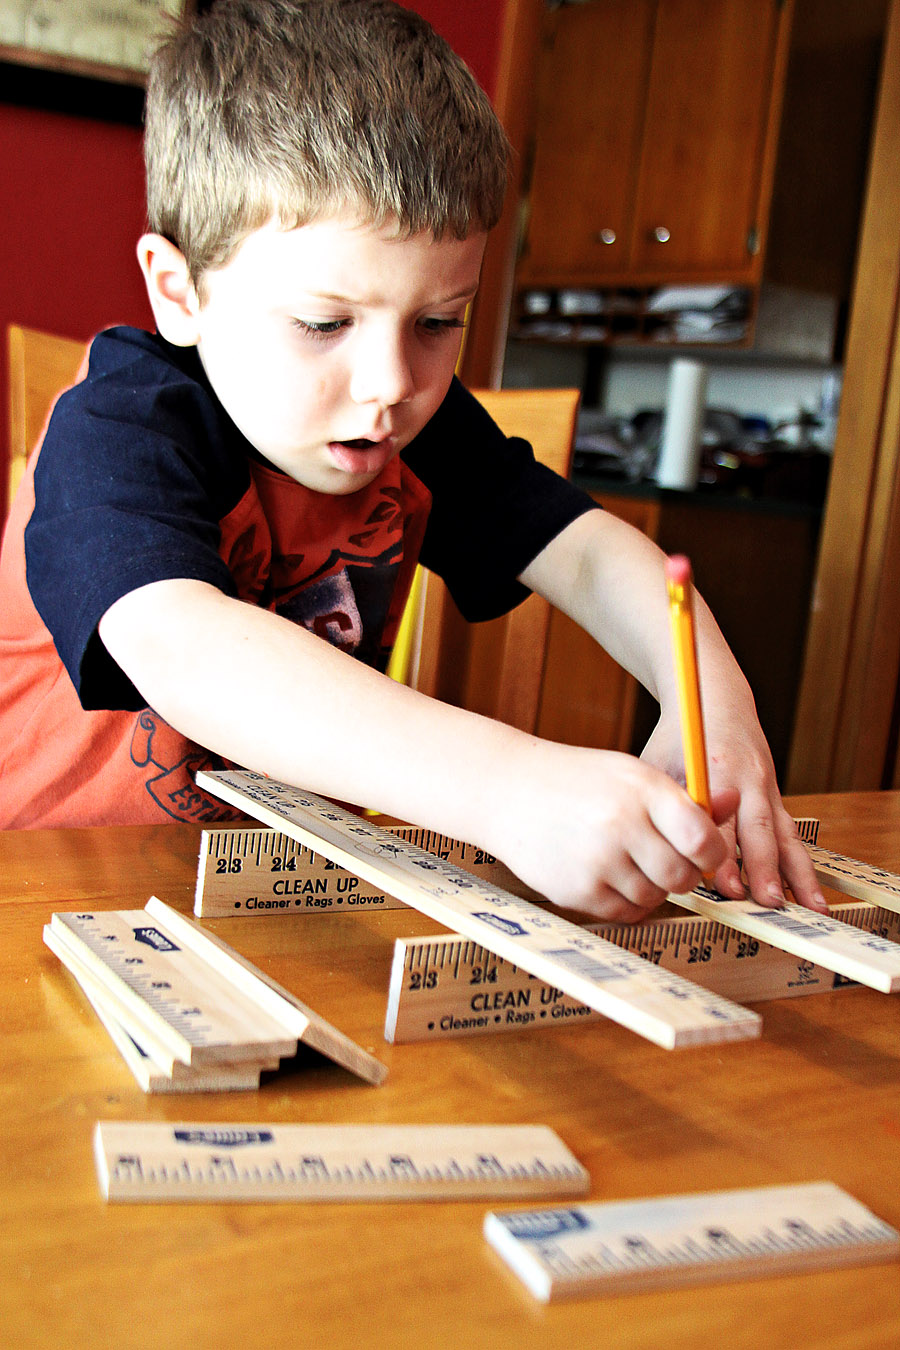
I pulled out the measuring tape and determined I had about a 3 inch deep by 18 inch wide by 6+ foot area of unused wall space and immediately decided a book rack would fill it in nicely.  Off to the hardware store with the boys (always a fun time) to pick up the supplies.  I had intended on getting thin wood dowels as the supports to hold the books in but then I saw the pine yard sticks in the paint section.  They were cheap (90 cents) and the blue type fit the room's color scheme...

I laid out my boards like a ladder.  Measuring and marking as I went. I put a 15 1/2" wide board as a shelf every 12 inches.  Then I decided I wanted a couple of shelves to be an inch larger... re-measured, re-marked.  Once I had the markings all set I laid it out in the garage and prepared to use the hubby's nail gun (sweet!).  Wood glue first, place shelves using pencil markings as guides and speed square to keep everything neat, then NAIL.


Once you have the 'ladder' all glued and nailed together you're ready to put on the rails.  I cut the yardsticks to the same width as the whole book rack.  I decided to use the middle portion so we wouldn't have the Lowe's logo on them (or the barcode)...  Can't believe I got permission to use the saw.  Can't believe I didn't lose any fingers.


Use wood glue to attach to the rack.  Then nail or clamp in place to hold until the glue dries. I placed my yardstick rails about 2 inches above the shelf.  I did not add lips to the shelves but it would probably be a good idea to do so.  The 1/2" x 2" boards cut to width of the rack would work well.


The scraps from the yardsticks will provide hours of entertainment for the kids...


Last step was to ask the husband to hang the shelves.  I am not qualified to do this.  My husband is ok with the book rack being a little wonky but he would not be ok with me wonking up the walls....


Fill with books.  Rearrange several times.  Try arranging by color. then by author. then decide your kids are going to mix it all up anyway and put their favorites on the lower shelves that they can reach.  Step back and admire.


So under $20 and 2 hours of time (with little kiddos interrupting) makes me one happy mama with the results!


e


Photobucket

October 5, 2010

old shirt, new shirt. small shirt, big shirt

Yes, we are Dr. Seuss fans in this house. One of my favorite Christmas gifts the year our second was born was a Thing 1 shirt and Thing 2 onesie. They never really fit both the boys at the same time. Now they have both definitely outgrown them.
I submit the following photos as evidence:


Have I mentioned I love these shirts?  I do. But while I'm perfectly okay with sending my kids outside half naked to play in the backyard I just couldn't possibly take them out in public wearing these (we are still at the stage where they have to hold my hand - can't deny knowing them while holding hands).

Good thing I know where to get $2 shirts (Michaels).  All I needed was a couple red shirts, some sharp scissors, and some no-sew iron on adhesive stuff:

I very carefully cut out the circles from the old shirts.  Phil sort of mocked my idea of cutting these out and making new shirts so I couldn't afford to make a mistake and let him be right.  I even managed to take a picture of myself while cutting the circles out with no mess ups.  I rock.

Then I followed the directions on the package to iron the paper onto the old shirt cutouts and then iron onto the new shirts:

While I had the iron out (it's been over a year since I've ironed. really.) I decided to iron on a pirate transfer to another $2 shirt... the other iron on transfer says 'yo ho ho and a bottle of rum' with a baby bottle picture on it.  My guys are a little too old for baby bottles so I'm saving that one for another project.

It goes great with the pirate gear

 Thing 1 really digs his new shirt:


Thing 2 not so much.

I think he's just bitter that he's not number one or maybe he preferred the skin tight onesie.  Probably the pout has more to do with the fact that he just woke up from nap and couldn't be bothered with posing for pictures.

September 20, 2010

just what I needed, another challenge ... I Spy Bag | DIY

My crafting aspirations are waaaay beyond my actual skill level.  I'm not sure that I've ever used a sewing machine but I've really been wanting to make these I Spy Bags for quite a while now so I borrowed my sister's sewing machine minus the instruction manual (mistake #1).  I could have done the no-sew, no-frills version by filling a ziplock bag with rice and I Spy trinkets, the kids would have dug it just as much, but then I would have missed out on using fun fabrics. On a mission, I scoured the internet for instructions or guidance.  Thank goodness for the Rosie Baby blog.  I highly recommend you follow her instructions at http://rosie-baby-crafty.blogspot.com/search/label/I%20Spy%20Bag if you are considering making one of your own seeing as I broke the needle on the machine (mistake #2, sorry Kathy) and trashed a spool of thread (mistakes #3 through 150). Seriously, follow the guide at the link.

Supplies:
Fabric, I used a Fat Quarter (18x22) so I could make 2 from each piece. I trimmed them down to 7x14 so the final bag was 6x6.
1 bag poly pellets (Joannes)
assorted trinkets
Clear vinyl
thread
sewing machine

Again, you should really follow the link for instructions if you want to make one. I'm not the person to be giving sewing instructions. We have a toy/junk jar at home filled with all sorts of trinkets collected over time from goodie bags and such. I filled the bags with things like marbles, magnet letters, tiny dinosuars, army men, buttons, dice, pennies. The boys loved picking out the items to go in their bags. Please ignore my janky sewing...


Testing out the bag. So far no rips or leaking beads (have I mentioned my boys are rough on toys?) and it bought me 45 minutes of quietly distracted kids while I did grocery shopping.


Despite countless times of having to rethread the machine and a few hours of grumbling (with some choice words thrown in!) I'm going to make a couple more. Maybe I'll even master this whole sewing machine thing