

September 27, 2010
couch bound with a cold
Sick as a dog. Sitting on the couch playing with the photo booth on http://laphotocabine.com/
September 25, 2010
MKD sneak peek | St. Louis Child Photographer
Today I got to photograph three sisters. These girls are absolutely gorgeous and fun! I was really feeling quite content with the size of my family - two boys suits us just fine. But after these pictures I'm kind of wishing I had a girl. Beautiful weather this morning but wet grass everywhere; we managed just fine. I'm pretty sure I could put these girls in front of a dumpster and they'd prettify it. It was really hard to even choose which pictures to put up so I let my kid choose. Here's the oldest sister:

And the middle sister. Same gorgeous blue eyes; just add curls...


Thank you, Tina and Christopher, for letting me photograph your beautiful family. Your girls were really fun to be around. I'll have more pictures to share soon!

And the middle sister. Same gorgeous blue eyes; just add curls...

And baby sister. She is a firecracker! One is such a lovely age. Its too bad one year olds are so hard to capture in a picture. Video is probably the way to go.
We didn't get professional pictures of our oldest son from the time he was 9 months until he was 2 years. We tried. We took him to the studio - they tried. We have a lot of pictures of the back of his head from that era. Trying to catch pictures of baby sister here reminded me a lot of those days.

Thank you, Tina and Christopher, for letting me photograph your beautiful family. Your girls were really fun to be around. I'll have more pictures to share soon!
September 22, 2010
my little man is 5 years old
No more diapers... I can hardly carry him he's gotten so big... where did my baby go? I know when he was a newborn I must have been told over a hundred times to "cherish the days - they go so fast". I guess I blinked, or was too sleep deprived to realize how fast time was moving, because now he is a little man. Full of independence and opinions. The evening before his birthday we went down the street to take pictures just before sundown to honor his "last day of being four". I've never seen him so excited or so willing to let me take pictures. Maybe because he knows 5 is a really big deal. Or maybe it had something to do with the monstrous pile of rocks and train tracks.


PHOTO TIP: The strongest silhouettes have the sun in the frame, either visible in the sky or masked behind the subject (as in my photos above). Make sure your flash is OFF. Point your camera at a bright portion of the sky - not directly at the sun; its a no-no - and press the shutter button halfway. Then recompose your picture to include the subject and fully press the button. This is the most basic how-to instructions. There is a lot of information out there just waiting to be googled if you're interested.
Happy Birthday little man, you'll always be my baby.
We got the very last of the evening light, some beautiful sunset colors. It gave me a chance to catch some silhouette pictures:
Silhouette pictures are best done at sunrise or sunset on the beaches of Hawaii or some tropical island. I was on the beaches of Hawaii at sunset but I didn't know the technique to achieve a silhouette (though I did get one or two by pure luck). Want to know how? Just in case you find yourself staring at a gorgeous sunset (hopefully in Hawaii). PHOTO TIP: The strongest silhouettes have the sun in the frame, either visible in the sky or masked behind the subject (as in my photos above). Make sure your flash is OFF. Point your camera at a bright portion of the sky - not directly at the sun; its a no-no - and press the shutter button halfway. Then recompose your picture to include the subject and fully press the button. This is the most basic how-to instructions. There is a lot of information out there just waiting to be googled if you're interested.
Happy Birthday little man, you'll always be my baby.
September 20, 2010
just what I needed, another challenge ... I Spy Bag | DIY
My crafting aspirations are waaaay beyond my actual skill level. I'm not sure that I've ever used a sewing machine but I've really been wanting to make these I Spy Bags for quite a while now so I borrowed my sister's sewing machine minus the instruction manual (mistake #1). I could have done the no-sew, no-frills version by filling a ziplock bag with rice and I Spy trinkets, the kids would have dug it just as much, but then I would have missed out on using fun fabrics. On a mission, I scoured the internet for instructions or guidance. Thank goodness for the Rosie Baby blog. I highly recommend you follow her instructions at http://rosie-baby-crafty.blogspot.com/search/label/I%20Spy%20Bag if you are considering making one of your own seeing as I broke the needle on the machine (mistake #2, sorry Kathy) and trashed a spool of thread (mistakes #3 through 150). Seriously, follow the guide at the link.
Supplies:
Fabric, I used a Fat Quarter (18x22) so I could make 2 from each piece. I trimmed them down to 7x14 so the final bag was 6x6.
1 bag poly pellets (Joannes)
assorted trinkets
Clear vinyl
thread
sewing machine
Again, you should really follow the link for instructions if you want to make one. I'm not the person to be giving sewing instructions. We have a toy/junk jar at home filled with all sorts of trinkets collected over time from goodie bags and such. I filled the bags with things like marbles, magnet letters, tiny dinosuars, army men, buttons, dice, pennies. The boys loved picking out the items to go in their bags. Please ignore my janky sewing...

Testing out the bag. So far no rips or leaking beads (have I mentioned my boys are rough on toys?) and it bought me 45 minutes of quietly distracted kids while I did grocery shopping.

Despite countless times of having to rethread the machine and a few hours of grumbling (with some choice words thrown in!) I'm going to make a couple more. Maybe I'll even master this whole sewing machine thing
September 17, 2010
from baby blankets to pillows | DIY project
I have a mile long list of things to get done around the house(in my head, to write it down would be too much of a commitment). Craft projects, organizing, home improvement, etc. This is one of those projects that was started but needed finishing. The boys have outgrown their baby blankets. They each have one blankie that they take to bed every night but other than those there are tons of baby blankets just sitting in a drawer. We decided to turn a couple of them in to floor pillows. In order to do this easily you need the type of blankets that have separate front and back fabrics.
The only supplies we needed were the blanket; needle and thread; poly-fil; and scissors.

Rip the seam out on a two inch section of the blanket then start stuffing with the poly-fil. We used about 3/4ths of the 32 oz bag. The first one we made we only used about half a bag and it has flattened down a bit more than I like so we overstuffed this one.

After stuffing it with poly-fil sew up the seam and you're done! I am not showing my sewn seam because the only thing I can sew is a button on.

The boys sleep with these and carry them from room to room.


I'm not sure how long they'll last since I don't think I can just throw them in the washer. I'm sure we'll de-stuff them when they get too dirty and make them into something else.
September 14, 2010
Bleach Tie Dye Shirts | DIY Project
This project had me a little nervous... my kids, playing with bleach? Really, what could go wrong? I decided we would go ahead and attempt it but made sure to lay out the rules first. Fingers crossed we started.
Supplies needed:
Solid color t-shirts (we got t-shirts from Michael's at 50% off; under $2!);
bleach;
spray bottle with fine mist;
water guns (I used Dollar Store bottles instead, guns filled with bleach would have turned ugly);
freezer paper cut into whatever shape you want (I was out. I used stick on letters. They weren't thick enough. I don't suggest using this method so stick with freezer paper);
Iron on the cut out of the freezer paper to the shirt then hang outside on a line with a piece of cardboard inside the shirt.


First spray around the letter or cut-out with bleach using the fine mist sprayer. Then let the kids spray the rest of the shirt using the bottles or water gun.


Remember the important safety rules: No spraying each other. No spraying when your brother is near your shirt. Be sure to wash your hands.


 One out of three ain't bad for these guys.
I swear, nobody got hurt. I think his favorite part was washing his hands. He sat there for a good 15 minutes

Once you're done spraying you can let it sit in the sun for a few minutes. It doesn't take long. The bleach will eat through the fabric if you leave it too long so wash them in cold water fairly quickly. Then wash and dry. This is what the letters would have looked like if I had ironed on freezer paper instead of using the regular paper cut outs.

The finished product wasn't too bad considering the mistakes we made. You can't really see the E on one but the A showed up okay. The boys are super proud of the shirts that they made and wanted to wear them right away (yes, they've been through the wash already). I'm happy to have shirts for them that only cost $2.


Supplies needed:
Solid color t-shirts (we got t-shirts from Michael's at 50% off; under $2!);
bleach;
spray bottle with fine mist;
water guns (I used Dollar Store bottles instead, guns filled with bleach would have turned ugly);
freezer paper cut into whatever shape you want (I was out. I used stick on letters. They weren't thick enough. I don't suggest using this method so stick with freezer paper);
Iron on the cut out of the freezer paper to the shirt then hang outside on a line with a piece of cardboard inside the shirt.


First spray around the letter or cut-out with bleach using the fine mist sprayer. Then let the kids spray the rest of the shirt using the bottles or water gun.


Remember the important safety rules: No spraying each other. No spraying when your brother is near your shirt. Be sure to wash your hands.


I swear, nobody got hurt. I think his favorite part was washing his hands. He sat there for a good 15 minutes

Once you're done spraying you can let it sit in the sun for a few minutes. It doesn't take long. The bleach will eat through the fabric if you leave it too long so wash them in cold water fairly quickly. Then wash and dry. This is what the letters would have looked like if I had ironed on freezer paper instead of using the regular paper cut outs.

The finished product wasn't too bad considering the mistakes we made. You can't really see the E on one but the A showed up okay. The boys are super proud of the shirts that they made and wanted to wear them right away (yes, they've been through the wash already). I'm happy to have shirts for them that only cost $2.


There was one injury as a direct result of our project... Thing 1 asked me what the clothes pins were for and I told him to hold your nose closed. I didn't think he'd actually try it on his nose.


September 7, 2010
let them fight it out
The boys have been fighting. A lot. Nothing new there really. What's been driving me crazy is that I'm called in as referee every five minutes. I think there has even been some lying creative storytelling going on by big brother in an attempt to get sole custody of a toy (No worries; this will come back on him. Little brother learns almost everything he knows from him!) So I'm tired of being called in to mediate. I just want them to work some things out on their own. What's the solution? Well my solution is to buy them weapons. Yes, really. Swords for each of them. Go ahead, fight it out. And since I'm not totally evil I even got them a shield for protection.

He really wanted his turn with the eye patch:

Mission accomplished; retreat!

I tried just giving them a plain ol' eye patch from our mish-mash of Halloween accessories but since they're cousin has a skull and crossbones on his pirate eye patch it means all patches must have them. I painted one on free hand. It looked pretty lame. Tip: a black sharpie can fix a lot of mistakes and make you look like a hero to your kids. Here's the improvised eye patch:

Then I was told that pirates needed to find buried treasure; so I drew up a map of our front yard. X marks the spot.

Then "buried" the treasure beneath some fallen leaves under the tree (clearly marked on the map; many hints were given; they were just not finding it; I guess my map drawing skills need some work). After some very specific directing they found the treasure.

The rule with the swords is if anyone gets hurt they both get put away. Now instead of hearing loud yells of "mom! he hit me!" I hear whispers of "shhhh, its ok buddy! I didn't mean to hurt you" since neither one of them wants to lose the sword. I don't anticipate this lasting long but I'll take what I can get.
Yes, I know the shield and one of the swords is a knight shield but he doesn't. FYI - the swords and sheilds are from Target for about $4 and are very sturdy. I know, my boys thoroughly tested them.
September 6, 2010
Happy Labor day...
I like holidays; especially when it means the out of town siblings are coming in town. Holidays equal extra adult time for me with my family and (way too much) extra playtime for my kiddos with their cousins. I always forget that holidays also equal: crabby kiddos with whacked out sleep schedules; a seriously higher level of noise and chaos; and a house in disarray from being away from home for the better part of the weekend.

...and her kids, of course.

Labor day weekend reminded us it was the end of summer and we had not yet pulled out the kiddos 4-wheeler. We charged up the battery and the boys spent a good hour tearing up the yard:

Then Phil decided they needed bug spray, which was not well received:

And last but not least one of my nephew because I almost never catch pictures of him:

He's a wicked-cool kid.
Of the 5 five sisters, only one lives out of town. When she makes it in town it provides a shatter proof excuse to get out with the girls. For that I am thankful. Thank you, Therese, for driving all this way so I can get a night out ;) I'm pretty sure she would be thankful everyday for these two things alone: peace and a cup of tea...

...and her kids, of course.

Labor day weekend reminded us it was the end of summer and we had not yet pulled out the kiddos 4-wheeler. We charged up the battery and the boys spent a good hour tearing up the yard:

Then Phil decided they needed bug spray, which was not well received:

And last but not least one of my nephew because I almost never catch pictures of him:

He's a wicked-cool kid.
September 3, 2010
Mommy is not in charge
My boys have often challenged the statement that I am in charge. Today we had no plans, school was closed, and I was out of ideas and energy so I told them that THEY were in charge. All day. They took a few moments to figure out if I was 'for real' serious and then off they went to test the limits.
Thing 1 started by drawing up a plan for the day. It involved birthday cake and candles. And squirrels.
 I explained to him that he was in charge, not me, so his activities had to be things that didn't require me to be in charge. Like turning on the oven, etc. I think I saw an eye roll before he headed off to find something else to do.
Thing 2 took up the Leapster and quietly played for a good 30 minutes. Thing 1 actually helped him, without fighting. So far, so good.


Thing 1 announces he is going outside to play; Thing 2 follows. Thing 1 has no shirt on; Thing 2 has no pants on. If the neighbors start staring I'll just explain 'I'm not in charge today'. At least Thing 1 had the sense to go back in and put on shoes:
So Thing 2 goes to get his shoes. Too bad he isn't able to open the door.

Guess I'll wait here:

Yes! Thank goodness for big brothers that can open sticky doors:

(I can't believe they are taking this whole 'I'm not charge thing' to the point of not even bothering me for help!)
Got shoes, good to go:


There was a LOT of running in circles around the house. Something that is not allowed when mommy is in charge.
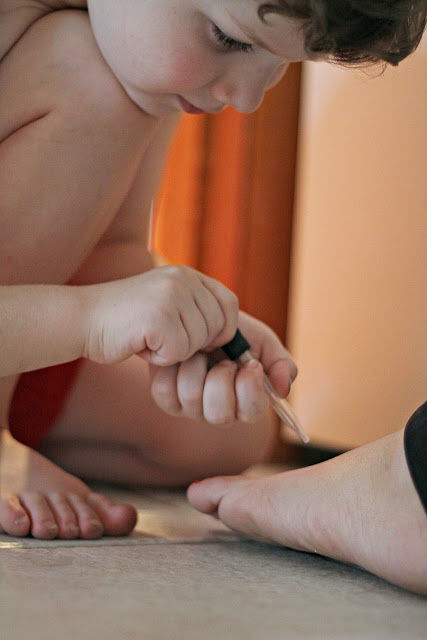
There was also a few moments of hitting the wall. Literally. With his face.

Which sent Thing 1 in to doctor mode. He checked on my foot. Apparently I have a case of "jar", which is stuff between the toes.
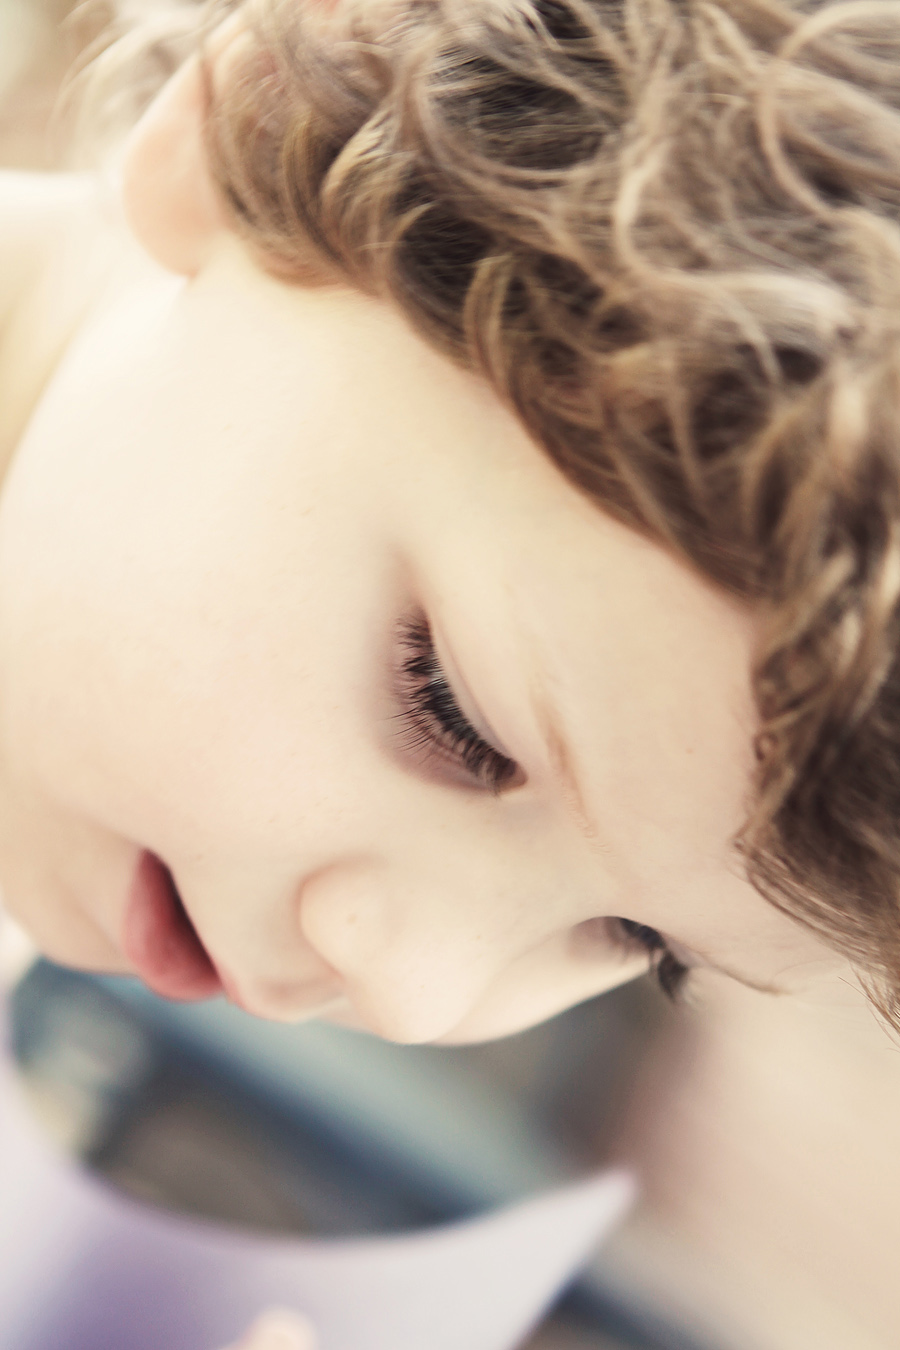
I got lots of requests to photograph various toys:

and teeth:
 Luckily, daddy came home and ended their reign. All in all they did really good all day. I liked the break from saying no about a hundred times. The house is total chaos, they desperately need a bath (or sterilization), and many rules were broken but I think they managed to wear themselves out all on their own.
Thing 1 started by drawing up a plan for the day. It involved birthday cake and candles. And squirrels.
Thing 2 took up the Leapster and quietly played for a good 30 minutes. Thing 1 actually helped him, without fighting. So far, so good.


Thing 1 announces he is going outside to play; Thing 2 follows. Thing 1 has no shirt on; Thing 2 has no pants on. If the neighbors start staring I'll just explain 'I'm not in charge today'. At least Thing 1 had the sense to go back in and put on shoes:
So Thing 2 goes to get his shoes. Too bad he isn't able to open the door.

Guess I'll wait here:

Yes! Thank goodness for big brothers that can open sticky doors:

(I can't believe they are taking this whole 'I'm not charge thing' to the point of not even bothering me for help!)
Got shoes, good to go:


I did fix them lunch. I'm sure there are some moral and legal limitations to not being in charge:

There was a LOT of running in circles around the house. Something that is not allowed when mommy is in charge.
There was also a few moments of hitting the wall. Literally. With his face.

Which sent Thing 1 in to doctor mode. He checked on my foot. Apparently I have a case of "jar", which is stuff between the toes.

I got lots of requests to photograph various toys:

and teeth:

Subscribe to:
Posts (Atom)